如何用15个简单步骤制作儿童小屋

Albert Evans 19-10-2023
Albert Evans

说明

小时候,我总是喜欢在用旧纸箱和毯子搭建的小房子里玩耍。 随着年龄的增长,这种游戏逐渐消失了,直到我去拜访一位朋友,她为儿子搭建了一个帐篷。

几周后,当我被困在家里,渴望利用业余时间做点什么时,我开始考虑回到童年,建造我自己的小木屋。

经过反复研究、购买各种材料和制定计划,我终于用几个简单的步骤搭建了一个小帐篷。

茶棚小屋是传统文化与创新的完美结合,它让我兴奋不已,我决定制作一个小小的指导手册,让您也能为您孩子的房间搭建一个属于自己的茶棚小屋。

您会发现这一过程相对简单,只需注意几个具体要点。

为了帮助您做好组织工作,我列出了一份您所需材料的简短清单:

  • 面料
  • PVC管
  • 热熔胶
  • 童话灯
  • 绳索
  • 颜料和刷子(可选)

布料可任意选择。 PVC管的长度和宽度也是一样。 但PVC管越长,帐篷就越大。

既然你已经知道了这个故事,现在是时候让你的双手变脏了。 跟我来看看DIY小屋的技巧,在另一个儿童游戏教程中享受乐趣!

步骤1:所需材料

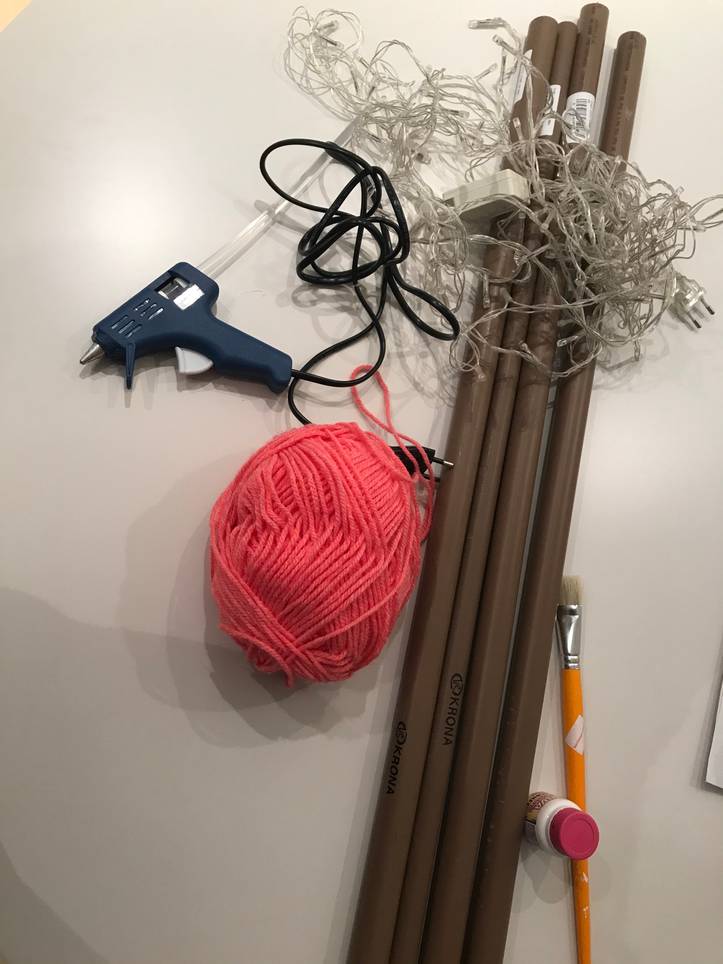
制作帐篷时,需要四根PVC管、热熔胶、LED灯或闪光灯、布料和绳子。 如果愿意,还可以用油漆和刷子进行最后的润色。

如果您不想使用白色PVC管,只需涂上您想要的颜色即可。

第二步:给PVC管上漆

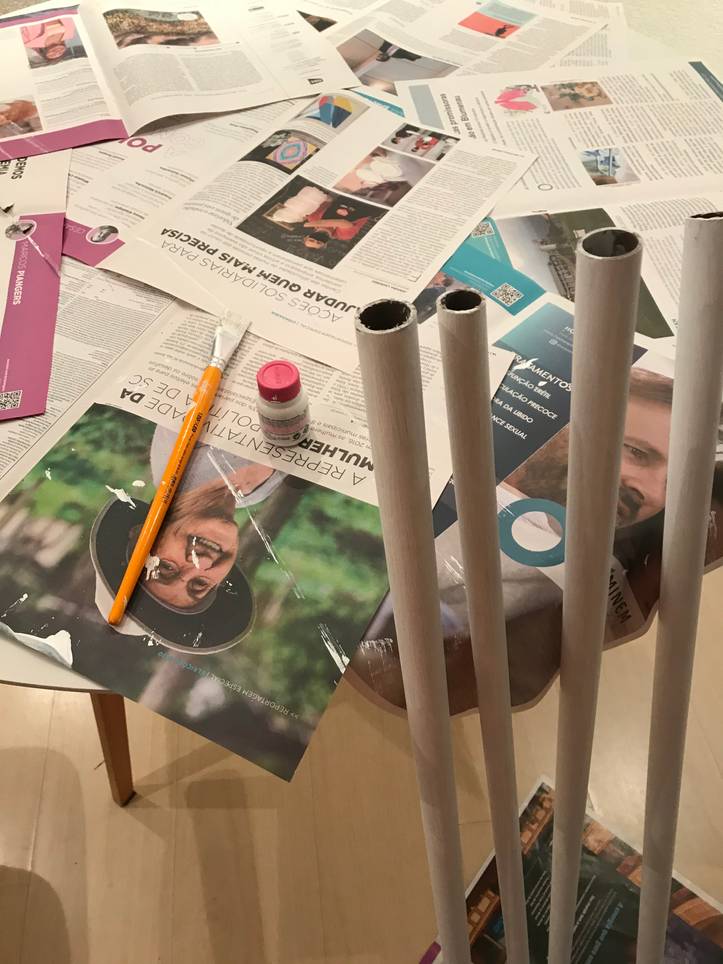
在我的案例中,我用油漆和刷子将PVC管刷成白色。 但这完全是可选的。

步骤3:定位管子。

将管子就位,确保管脚间距相同。 使用卷尺帮助完成此步骤。

第四步:将管子固定到位。

用绳子或绳索将管子固定好,尤其是中间部分,将管子相互绕一圈,以增加安全性。

任何类型的绳索或绳子都可以使用,但越粗越结实越好。

第五步:纱线打结

绑扎牢固,以免结构倒塌。

第六步:放置布料。

确保两侧的布料数量相同。 我第一次尝试时,有一侧没有布料,所以我沿两侧剪开了所有布料。 对于喜欢隐私的人来说,这不是一个好办法。

如果您手头有一些废料,可以用它们来制作一个更真实、更有趣的帐篷。

第7步:粘贴布料。

用热熔胶将布料粘在PVC管上。

第八步:将布料粘在所有管道上。

为了使结构更加牢固,可将织物粘在所有管道上。

使用热胶。

第九步:检查织物是否拉紧。

粘合时,确保布料结实紧绷,这对站在帐篷内而不撞到布料非常重要。

第10步:填补空白

用热熔胶固定布料的两侧,粘贴的位置为⅓或更低。

第11步:添加一个小窗口

这一步是可选的,如果您想保持整个帐篷的封闭性,您不需要创建一个窗口。 小窗口的想法是创建更多的真实性,以类似于越野帐篷。

See_also: 洗衣机维修技巧

在帐篷靠近管道的一侧开孔。

第12步:安装盖板

将绳子穿在孔上,打结固定布料。

步骤13:在另一侧进行同样的操作。

确保孔位对齐,以获得更好的最终外观。

第14步:装饰帐篷

我用闪光灯为我的帐篷增添魔幻色彩。

See_also: 如何用12个步骤去除微波炉中的爆米花焦味

第15步:您的DIY帐篷准备就绪!

放上枕头和毯子,帐篷就准备好了!

我更喜欢用我手头的东西来装饰。 我也是这样做的!事实上,进入帐篷,感觉自己又回到了童年,这是一件令人愉快的事情。 这是一个穿越时空的入口。

那么,您喜欢这个主意吗? 那就趁此机会看看如何用宠物瓶制作存钱罐吧,这样会更有趣!

Albert Evans

Jeremy Cruz is a renowned interior designer and passionate blogger. With a creative flair and an eye for detail, Jeremy has transformed numerous spaces into stunning living environments. Born and raised in a family of architects, design runs in his blood. From a young age, he was immersed in the world of aesthetics, constantly surrounded by blueprints and sketches.After obtaining a bachelor's degree in Interior Design from a prestigious university, Jeremy embarked on a journey to bring his vision to life. With years of experience in the industry, he has worked with high-profile clients, designing exquisite living spaces that embody both functionality and elegance. His ability to understand clients' preferences and transform their dreams into reality sets him apart in the interior design world.Jeremy's passion for interior design extends beyond creating beautiful spaces. As an avid writer, he shares his expertise and knowledge through his blog, Decoration, Interior Design, Ideas for Kitchens and Bathrooms. Through this platform, he aims to inspire and guide readers in their own design endeavors. From tips and tricks to the latest trends, Jeremy provides valuable insights that help readers make informed decisions about their living spaces.With a focus on kitchens and bathrooms, Jeremy believes that these areas hold tremendous potential for both functionality and aestheticappeal. He firmly believes that a well-designed kitchen can be the heart of a home, fostering family connections and culinary creativity. Similarly, a beautifully designed bathroom can create a soothing oasis, allowing individuals to relax and rejuvenate.Jeremy's blog is a go-to resource for design enthusiasts, homeowners, and anyone looking to revamp their living spaces. His articles engage readers with captivating visuals, expert advice, and detailed guides. Through his blog, Jeremy strives to empower individuals to create personalized spaces that reflect their unique personalities, lifestyles, and tastes.When Jeremy is not designing or writing, he can be found exploring new design trends, visiting art galleries, or sipping coffee in cozy cafes. His thirst for inspiration and continuous learning is evident in the well-crafted spaces he creates and the insightful content he shares. Jeremy Cruz is a name synonymous with creativity, expertise, and innovation in the field of interior design.